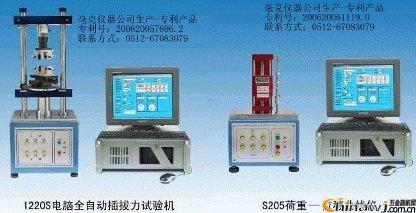
Insertion and pull force testing machine test example operation instructions insertion force test machine test example operation instructions
One: the test of insertion force
1. Measure the movement mode: go back to the two-way measurement, the speed is 1~300 (standard machine speed), and the number of tests can be adjusted arbitrarily from 1 to 10000000. "Start measuring position, check out the origin once"
2. Insert the male and female connectors of the tested product, and clamp them with the clamp. The clamp should be vertical. The automatic centering device should be in the vicinity of the center position. It should not be deflected, so as to avoid affecting the automatic heart-trimming function and damage device.
3, the load, the trip to zero, press the panel's move button to separate the male and female ends of the test product, in order to not completely out of the principle, see the movement of the display.
4, set the test stroke, in principle, less than the actual stroke 0.1 ~ 0.2mm.
5. After setting various parameters, click the file, click Pre-set storage, save the file, the file name can only use letters and numbers and ".", "-", there can be no spaces.
6, to the implementation of the screen test.
If you can't find the stroke, you must use the height gauge to insert the male plug's insertion stroke, adjust the position of the male and female connectors, and set the stroke. Also set the stroke can not be greater than the measured stroke. The starting position is also important.
Two: breaking test
1. Clamp the test product into the upper or lower clamp and adjust the height of the upper and lower clamps to ensure that the product can be clamped.
2. Set to “break break testâ€, the stroke is based on the actual stroke of the test product, so that it can be completely pulled out.
3. Set the speed, number of times, and store the file.
4. Return to zero and clamp the test product. (Note that you should not return to zero after clamping)
5. Perform a screen test.
Three: PIN test
1. Connect the sensor interface with the test rod, test the product to lower the fixture, and adjust the appropriate position;
2. Set the load measurement range to be greater than the force that can be withdrawn from the product. The stroke measurement range should be less than the stroke of the "PIN" above the insulation surface. In order to avoid the stroke is too large, the actual force value of the PIN can not be caught in the execution screen.
3, select "load weight zero position (only when the force starts to count), each time the origin is detected", archive.
4. Perform the operation.
Another method is to measure the motion mode as "going one-way measurement", and the other settings are the same. There is only a black return force curve in the curve.
Four: constant pressure, tensile test
1. Select a constant pressure and the software will automatically jump out of the “force†and “time†data frames. Fill in the force and time to be tested separately, and save the file;
2. Clamp the test product and adjust the appropriate position;
3. Test, when the set force value is sensed, the timing starts, and the set time is completed.
The constant pull force is also set, except that the constant pull test has no return stroke.
Note that these two tests are slower, usually around 30.
Five: longitudinal force test
1. Need to select the load zero position, each time the origin is detected, the unit selects “gramâ€
2. Use the test rod to connect the test head of the corresponding specification.
3, adjust the position test, you can test the corresponding stress value of the stroke
Some customers need the stress value of the bottom point corresponding to the stroke. You can call the millimeter instrument after-sales technician.
Six: load-displacement test
When the user wants to test the product: when pressing a required force value, what is the deformation stroke of the product, or the force value when the deformation is shifted, the following steps can be taken:
1. Set the load measurement range to the required force value, and the stroke is large enough;
2, select the load zero position, each time the origin is detected,
3, speed (usually around 30), times, archive.
4, test, look at the imax of the waveform diagram is the stroke required to test.
Seven: contact resistance test
1. Test the setting parameters according to the normal insertion force
2. Select the insertion point resistance value in the last column of the measurement item column.
3. Clamp the corresponding connector male and female ends with the impedance test fixture
4,
Such as other extended test items such as anti-bending test, peel force test, displacement load test of shrapnel switch, constant tensile life test, force value measurement at break, etc., milligram brand insertion force can be achieved. Detailed operation method can call 15995758658 Wei Jia or qq853803917 mailbox [email protected]. In addition, the above methods of operation are only applicable to the milligram brand insertion force testing machine with patent certificate.
Http://news.chinawj.com.cn
 Editor: (Hardware Business Network Information Center) http://news.chinawj.com.cn
Glass Shower Hinge, Stainless Steel Glass Hinge,Glass Sliding Door Hinge
Jiangmen Yunspire Sanitary Ware Hardware Industry Co., Ltd. , https://www.yunspirefaucet.com