The warm and soft texture of the wallpaper, and the colorful colors of the wallpaper patterns are the favorite choices of many owners. However, the paving of wallpapers requires a high level of workmanship and requires professional workers to construct the material. The effect of the effect will be great. Some owners choose to put their own wallpaper, and some owners do not have to put their own hands on the wallpaper, but it is best to understand the correct and standard wallpapering steps for how to paste wallpapers before they can supervise and grasp the construction of workers.
Wallpaper layout process
First, deal with the wall surface

Shovel shovel
The old walls that have been painted have to be shovelled first, especially from the old ones; because the paint on the new house is very thin, you can just approve the wall directly.
2. Batch wall
There are more or less uneven spots on the walls of the walled walls or on the walls of new houses. Therefore, depending on the specific conditions of the walls, it may be partially repaired or approved on a large area to make the walls look as a whole. Very flat.
3. Polish
The wall is well aired for a day or two. After it is completely dry, it must be sanded. The wall surface can be polished to create small particles, small concave and convex surfaces are smooth to the mill. The above three small steps are also the processes that must be done for brush coating.
Second, brush base film (or varnish)

The role of base film and varnish is to form a solid protective layer on the wall to ensure that the wall will not be damaged when the wallpaper is changed next time, and it will also play a role in waterproofing and mildew. Relatively speaking, the base film is odorless and environmentally friendly, and it does not harm the body. The varnish can make the wall surface more solid and the effect is better, but the varnish smells great and contains toxic substances. Inhaling too much damages the body.
Third, check the wallpaper
After the wall surface is properly treated, it takes one to two days to wait until the walls are dry and then wallpaper.
Fourth, modulation glue
Or a large basin, a roller, a new cloth, a ruler, a sharp utility knife, preferably a scraper (to be soft). Prepare these materials before you can make glue.
Fifth, wallpaper

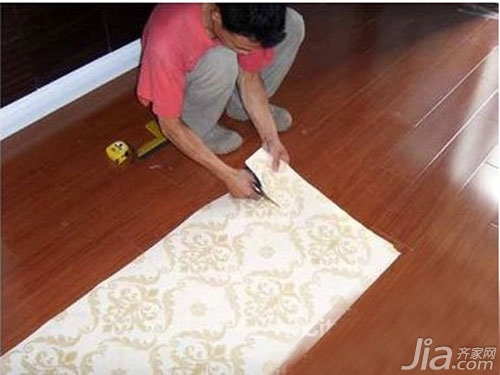
Before the wallpaper is cut, it is necessary to measure the height of the wall, and also to see if the pattern of the wallpaper is large. It is estimated that how many sizes should be left for the flower, and the length of each wallpaper should be determined. Then according to the number of the finished wallpaper volume, cut in order. Each piece of wallpaper that has been cut out must also be placed in order, especially if it cannot be put in a random manner. In this way, the previous sorting work is in vain and the wallpaper will be prone to color aberration. Under normal circumstances, only three volumes of wallpaper can be cut first, and there should be no color difference. Because there are obvious color differences in the wallpaper, manufacturers can only lose up to 3 volumes.
Six, wallpaper decoration glue

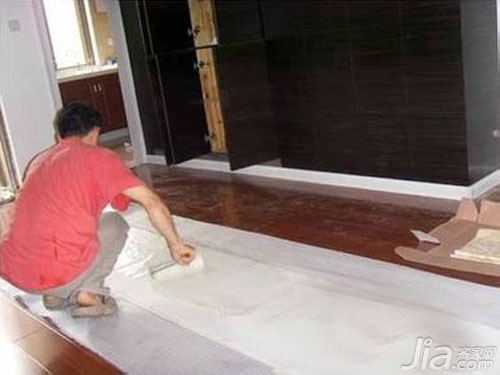
Find a table, take the wallpapers to be put in order, spread on the table, and apply glue on the rollers one by one. The glued wallpaper can be folded and placed. When folded, there is a glue on the side facing the glue, with the surface facing the surface, avoiding glue to get on the surface of the wallpaper. All well-rubbed wallpapers should also be placed in order, ensuring that the order is correct.

Seven, wallpaper decoration shop
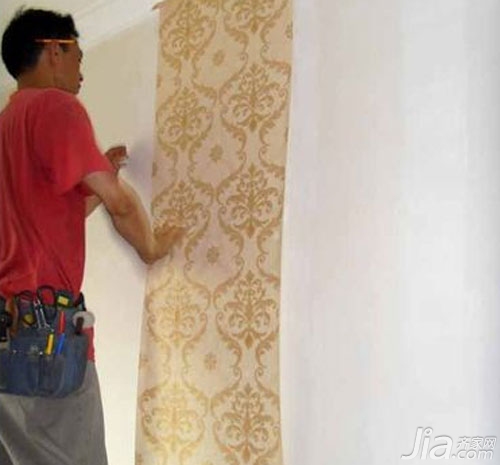
After gluing the wallpaper, wait 2-3 hours to ensure that the glue penetrates fully into the bottom layer of the wallpaper. When it is pasted, it will give priority to the piece of wallpaper that was first brushed with glue, then the next one will be brushed with glue, and so on.

Eight, wallpaper finishes
After 3 rolls of paper are finished, generally a wall can be completed. You can stand directly in front of the wall, and look at both the left and right, there is no light color, mosaic problems, other defects and so on. If there are no problems, then continue to cut other wallpapers in order, brush glue, and put on the wall.
Precautions for wallpapering1. Before wallpapering the wall for processing, scrape putty powder and apply flat varnish or base film, dry and then paste wallpaper. To brush the base film, prepare a large washbasin, a roller, and a paint brush. Pour the base film into the basin, according to the instructions, add appropriate water, adjust to the appropriate concentration, you can use the large area of ​​the drum to start the brush, and the corners are painted with individual brushes to ensure that each corner is brushed Base film; if it is a varnish, then put the appropriate amount of varnish into the basin, add the banana water, dilute to the appropriate concentration to brush the wall above it, but before the varnish, if the floor has been paved, the best Placing newspapers and the like around the wall around the wall to prevent the varnish from soiling the floor will be difficult to remove.
2. During the inspection of the wallpaper, you can check the purchased wallpaper to see if there is any unexpected situation. Look at the color and pattern first, whether it is your own set of wallpaper, and then look at each roll of wallpaper model and batch number, whether it is a batch number, in order to ensure that there will be no color difference. Look again at whether there is a roll number (some manufacturers do not have a roll number), if there is a roll number, then arrange the wallpaper in order according to the roll number, because the roll number is the closest, the color difference between the wallpaper will be the least. If there are a lot of wallpapers in the same paragraph, then sort by box number first and then relocate the number.
3. Use dry sticking when wallpapering. Do not use water-bubble wallpaper.
4. Prepare the glue and pour the wall powder into the pot. Slowly add water and adjust it into a rice flour paste. You can wait for half an hour because the wall powder will slowly expand. If you find it is too dry, continue to add water. It's best to leave part of the wall down, because if the glue is thinned, you can add a little wall powder. Finally, adjust the glue, you can use a piece of chopsticks to try the vertical plug into the pot, do not immediately drained to indicate the concentration can be. Then add the purchased wall glue and mix well to increase the viscosity of the glue.
5. The first wallpaper is better, but it is also the most important one, so it must be guaranteed to be vertical. It is advisable to use a vertical line on the wall for reference beforehand. When you paste, make sure the position of the wallpaper is fixed. From the top of the wallpaper, use a towel or a scraper to squeeze the excess glue from the middle of the wallpaper to the outside, or squeeze the excess glue from the top to the bottom. (If the surface of the wallpaper is fluffy, you can only squeeze the glue down, because if the glue gets to the velvet surface of the wallpaper, it will not be wiped off and a white mark will form).
At the beginning of the second episode, it is necessary to consider the use of flowers (plain or plain patterns do not need to spend), so the second one will have to be tested first before it can be stitched with the first one. After a good pattern, it is necessary to look at whether the seam between the second sheet and the first sheet is just spliced ​​together. The seams are too large and the size will affect the overall effect. Therefore, generally we will try hard to sew the top one-meter-long wallpaper first, and use a scraper or a towel to squeeze out the excess glue, fix it, and start to paste it. After posting a good one, stand a little further to see if there is a color difference, there is no problem with the spelling, etc. If there is no problem, you can post the third one, and so on.
Things that owners need to pay attention to in this step
1. Do not open doors and windows during construction, air-conditioning, 2-4 days after the construction is completed, then the wallpaper will be completely dry and then ventilated.
2. Use a varnish brush on the wall. The varnish should be dry for about 2 days. Pay attention to the ventilation and then remove the varnish and then apply the wallpaper.
3. Non-woven paper on the paper is folded and left standing for 5-10 minutes;
4. Sofia, Raphael, Ivan and other fiber papers have higher viscosity.
5. American glue is not suitable for fiber paper. The glue drying speed is too fast to stick wallpaper.
Wallpaper wallpaper
DC Motor Ball Style Ceiling Fan Light
Flush Mount Ceiling Fan With Light,Commercial Ceiling Fans,3 Blade Ceiling Fan,Creative Ceiling Fan Light
JIANGMEN ESCLIGHTING TECHNOLOGY LIMITED , https://www.windfansummer.com